

Wednesday, July 18, 2012
I know this is a new blog and all...
and I don't have many readers... at 2 I can't even say I have a few. But I would love the chance to get a customized design! I want something that is classic yet has a little bit of personality. And so, in an attempt to make this blog a little more traffic friendly (does that even make sense?) I am entering into a contest to win one. Check out Christi's work. It is really cute and definitely affordable. Cross your fingers for me... and if you want a new design enter the contest here.
Pinterest Project
Pinterest is loaded with all kinds of cute crafts that can be done, especially for your classroom. And when you teach in a trailer portable you will do anything you can to make the inside semi cute. (If only I had pictures of the inside right now... poor trailer is in rough shape). So with that, I decided to go ahead and try to make the teacher toolbox that I was seeing all over pinterest.


(please excuse the picture quality- I have decided that I will be using my old point and shoot for all things school related because I am not lugging my nice camera back and forth and I want to keep these pictures separate from our personal pictures.)

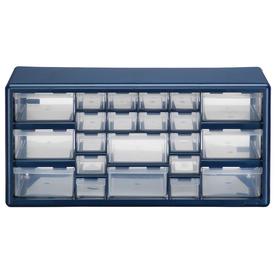
So after figuring out what I needed, I went to Home Depot and Lowes on the hunt for this toolbox. I went to HD first because they had it in gray... except they were out. So when I got to Lowes and they only had blue (which did not match my color scheme I was going for) I knew I was going to spray paint it. I went to Michaels and got some paper in shades of pink and gray. I also got some sparkly ribbon to put on the lip of the drawers. I spray painted the toolbox with two coats and it was as easy as can be. I got spray paint meant for plastic and went on my way. No sanding for this girl. This is the toolbox before... (picture taken from Lowes site because I was so excited to start that I never took a picture).
The site where this idea came from had a printable for the drawer labels. I decided to make my own because I wanted a different font (and I think a couple different labels as well). I also made a pattern piece for the size that I wanted to cut my scrapbook paper into. It was really easy to make and only took a few minutes.


Next, I printed out the labels on white paper and cut them out. I decided what color was going to go on each drawer and traced the "pattern pieces" onto the scrapbook paper. I cut those out and mod podged them on top of the white labels so that all I could see was a white strip with the word on the bottom. I used mod podge because I couldn't find my regular glue and I was hoping this would stick better anyways.
 |
| (Don't mind the date, I give up trying to re-set the date every time I charge the battery.) |
Once they all dried, I used some Quick Stick adhesive spray to stick the labels onto the drawers. And I tell ya, that stuff is strong. I did a test on the back of a drawer and I don't think I could get that paper off if I tried. The only problem I had is that the stuff is sticky and being that I was spraying multiple drawers, my hands were a sticky mess. Some of the drawers I know I will need to redo because I was losing patience, but so far nothing has fallen off. And some of the papers got a little wrinkly but it's ok, I still love it! Last, I took my sparkly ribbon, cut pieces the length of the drawers and hot glued them on. And I give you my new teacher toolbox that I can not wait to stick on my desk.
 |
 |
| (I have since turned the date feature off on the camera) |
If you want a copy of my labels, you can get them from google docs here (if this doesn't work, someone please let me know). I am NOT taking credit for this as my own idea (as you can see I linked the original poster above) but I figured I would just share my labels for people that may want a different font.
(please excuse the picture quality- I have decided that I will be using my old point and shoot for all things school related because I am not lugging my nice camera back and forth and I want to keep these pictures separate from our personal pictures.)
Tuesday, July 17, 2012
Sentence and Fragments- Easy Peasy!
Our first grammar skill of the year is sentences and fragments. And I am convinced no matter how long I spend on it, or how hard we work on it, some kids just refuse to give up writing fragments. So, to try to help them recognize the difference between a sentence and a fragment (and to do it in a semi-fun way) I created a sentence and fragment sort game. Students will sort lemons into the correct "cup of lemonade" (sentence or fragment) and record their answers on a recording sheet.
 Why a lemonade theme? Well because we start school in August and lemonade is the perfect summer drink... and well, I thought the clip art was cute! Anyways, my plans for set up are:
Print and laminate the labels (sentence and fragment) and glue them onto some clear cups (think red solo cup, but clear). Print and laminate the directions lemon slice and the sentences and fragments lemons and put them in a bag or other container (I am a little container obsessed so we will see if I find one that I think fits). Print and copy the recording sheet and put it in a folder near the center. Students will complete this activity with a group during their turn at the center. (I may make two sets this way there aren't as many children playing at once.)
The students will sort the lemons into the correct cups and record their answers on their recording sheets. As an extra challenge (early finishers or above level students), they can take the fragments out of the cup and try to turn them into sentences. They can write the new sentences on the back of their recording sheet.
Once I set mine up I will take and post pictures...which I should do soon since we head back to work in 2 weeks... YIKES!
If you would like to purchase this, please go here. It is only $2!
Here is an image of what is included in the activity.

Tuesday, July 3, 2012
new here...
Another adventure is on the way for me. I have decided to get into the creating educational resources world and I figured I should just start a blog about it too. Why not right? This post is just a test post so I can edit my settings... real content coming soon....
Subscribe to:
Posts (Atom)